Essential AML 3.0 product information.
Interface
Option | Description |
|---|---|
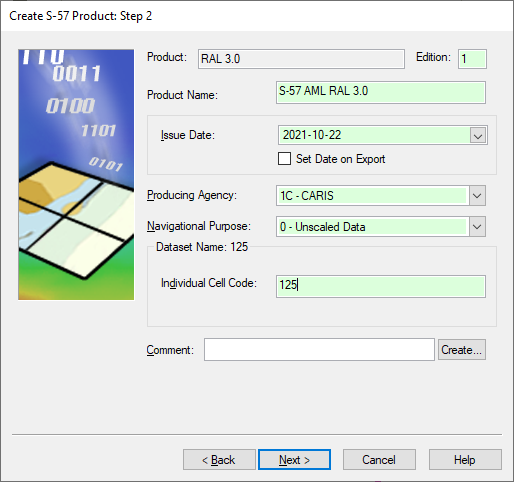
Product | [Read-only] Product type selected in the previous step. |
Edition | Start number for editions. This defaults to 1. Change this number if necessary by typing a new number in the box. |
Product Name | Name for the product. Type in the box. |
Issue Date | • Issue Date: Date for the product. Select a date by clicking the down arrow to display a calendar. • Set Date on Export: • On: Apply the export date to the product. The Issue Date field is inactive. • Off: Apply the date in the Issue Date field. |
Producing Agency | Two-digit code indicating the country of origin. Select from the list. |
Navigational Purpose | Scale range, or usage, of the product. Select from the list. |
Dataset Name | • Individual Cell Code: A unique five-character code that identifies the base cell. The cell code is used as the file name of the AML file. Any alphanumeric combination can be entered, but it should follow the AML 3.0 standard. This requires that the file name include a three-character country code. These codes are listed at https://en.wikipedia.org/wiki/List_of_NATO_country_codes. |
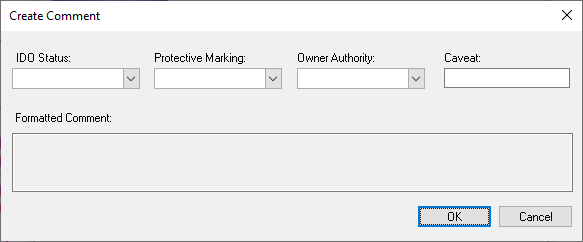
Comment | Other information. Type in the box. A mandatory field that contains the standards of protection required for the data. 1. Type a Comment or click Create. The Create Comment dialog box is displayed.
As you define the options, the comment is displayed in the Formatted Comment box. Options: • IDD Status: The status as defined by the International Defence Organization. If you define this, the Caveat option becomes in active. Select from the list. • Protective Marking: The classification code or minimum standards of protection for the data. Select from the list. • Owner Authority: This is derived from the country code. Select from the list. • Caveat: The clearance level for viewing data with a Confidential level or greater. This field is not available if an IDD Status is set. 2. Set any necessary options. 3. Click OK. You are returned to the Step 2 dialog box, and the formatted comment is inserted in the Comments field. |
Procedure
1. Define any necessary options.
2. Click Next.