![]() CARIS HPD Source Editor
CARIS HPD Source Editor
![]() CARIS HPD Product Editor
CARIS HPD Product Editor
Menu | Create > New Feature > Temporary Change |
Create a temporary change feature from a superselected feature.
A temporary change feature has the acronym tmpchg. It has three attributes: the start and end dates for the change and a group of one or more attributes that inform users of the nature of the change. For example, INFORM, TXTDSC, or PICREP could be used.
The temporary change feature is linked to the superselected feature. The relationship can be seen in the Relations window, or by using the Select Relationships command.
Temporary change features are not automatically deleted at the end date and must be removed. |
Temporary change features will not be visible unless you select them. Once the product is exported, they will only be visible within the date range you assigned. Outside of that date range, the original feature will be displayed.
See Temporary Features in the HPD® User Guide for more information.
Interface
Attribute Name | Acronym | Description |
|---|---|---|
Start Date | startDate | The start date of the change. 1. Select a date from the calendar.
|
End Date | endDate | The end date of the change. 1. Select a date from the calendar.
|
Attributes to Override | attsToOverride | The attributes of the original feature that you want the temporary change feature to override. If the original feature is being moved or if its geometry is being changed, you do not have to select any attributes to override, although it is probably good practice to put a note describing the change in an appropriate text attribute. If any attributes of the original feature need to be modified, such as the status of a light, you must include those attributes here. |
Procedure
1. Select one or more features.
Make a note of the superselected feature and its attributes. This is the feature you will be changing.
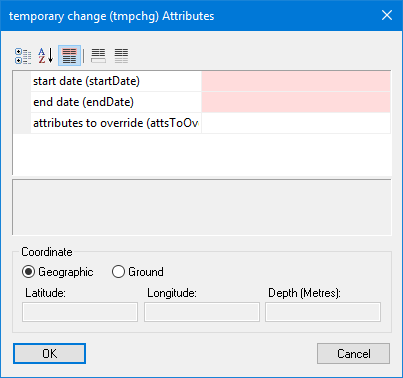
2. Select the Create Temporary Change command.
The Temporary Change Attributes dialog box is displayed.
3. Select a start and end date.
4. Select the attributes you want to override.
5. Click OK.
A temporary change feature is created. It has the same geometry as the superselected feature and includes any attributes selected using the Attributes to Override option, with the attribute values the same as defined on the original feature
Now define the changes to the feature.
To change the attributes:
6. Select the temporary change feature.
7. Select the Edit Mode command.
8. Display the Attributes window.
This will contain the attributes Start Date, End Date, and Attributes to Override, plus the attributes you chose using the Attributes to Override option.
9. Modify any necessary attributes.
10. Save the product.
To change the geometry:
11. Make sure the Shared Edit command is disabled.
This is very important. If this command is enabled, the original feature will be changed. You want to change only the temporary change feature.
12. Select the temporary change feature.
13. Select the Edit Mode command.
If the temporary change feature is a point feature, you can move it. If the temporary change feature is a line or area, you can change the shape and size by moving, adding, or deleting vertices. See the Edit Mode help for details.
14. Make any necessary changes.
15. Exit from the Edit Feature command.
16. Save the product.
Once you have made all the changes, you can export the product.
17. Select the Export Product command.
All changes in the exported product will only be visible within the date range you assigned.