Menu | Tool | Key | Description |
|---|---|---|---|
— |
| — | Capture a selected feature in Product Editor or Paper Chart Editor. |
Bold |
| Ctrl+B | Make selected text bold or make selected bold text normal. If the cursor is within a word but no text is selected, the entire word is formatted. |
Italic |
| Ctrl+I | Make selected text italic or make selected italic text normal. If the cursor is within a word but no text is selected, the entire word is formatted. |
Underline |
| Ctrl+U | Underline selected text or make selected underlined text normal. If the cursor is within a word but no text is selected, the entire word is formatted. |
Subscript |
| — | Make selected text subscript or make selected subscripted text normal. If the cursor is within a word but no text is selected, the entire word is formatted. |
Superscript |
| — | Make selected text superscript or make selected superscript text normal. If the cursor is within a word but no text is selected, the entire word is formatted. |
Remove Format | — | Ctrl+space | Remove all formatting from selected text. If the cursor is within a word but no text is selected, the entire word is unformatted. |
Font and Color |
| — | Select a typeface, style, size, colour, and effects. for selected text. The Font dialog box is displayed.
If no text is selected, the font information is applied to new text as it is added. |
Ordered List | — | — | Insert an ordered (numbered) list. Select the command again to end the list. |
Unordered List | — | — | Insert an unordered (bulleted) list. Select the command again or press <Enter> to end the list. |
Increase Indent | — | — | Increase the indent of the paragraph containing the cursor. If the paragraph is an element of an ordered list, it is moved to the next level and numbering restarts at 1. |
Decrease Indent | — | — | Decrease the indent of the paragraph containing the cursor. If the paragraph is an element of an ordered list, it is moved to the previous level and numbering continues based on the level. |
Justify Centre |
| — | Align one or more selected paragraphs to the centre. |
Justify Left |
| — | Align one or more selected paragraphs to the left. |
Justify Right |
| — | Align one or more selected paragraphs to the right. |
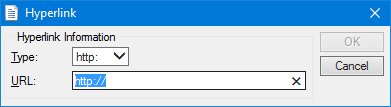
Insert Hyperlink | — | Ctrl+K | Insert a hyperlink. 1. Type the text you want to appear in the description. 2. Select the text. 3. Select the Insert Hyperlink command. The Hyperlink dialog box is displayed.
4. Select a hyperlink type from the list. 5. Type the rest of the URL. 6. Click OK. |
Remove Hyperlink | — | — | Remove a hyperlink. Click on the hyperlink and select Remove Hyperlink. The text is not removed. |
Insert Horizontal Line | — | — | Insert a horizontal rule below the current line of text. |
Undo | — | Ctrl+Z | Undo the most recent action. |
Redo | — | Ctrl+Y | Redo the most recent undo. |
Cut | — | Ctrl_X | Cut text or other content and put it in the clipboard. |
Copy |
| Ctrl+C | Coy text or other content and put it in the clipboard. |
Delete | — | Del | Delete text or other content without saving it to the clipboard. |
Paste |
| Ctrl+V | Paste the current contents of the clipboard at the location of the cursor. |
Select All | — | Ctrl+A | Select everything in the edit box. |
— | Ctrl+P | Print the HTML file. The Print dialog box is displayed. | |
Print Preview | — | — | Display a preview of the HTML file. |
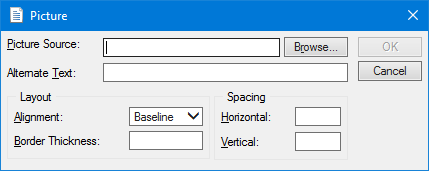
Insert Image | — | — | Insert an image. The Picture dialog box is displayed.
Options: Picture Source: The image to be inserted. Click Browse to locate and select an image. Alternate Text: Text that will be displayed if the image cannot be. Type in the box. Layout: Set the alignment and appearance of the image. • Alignment: Select from: • • • • • • • • • • • Border Thickness: If this is set, a border is drawn around the image. If not, no border is drawn. Type a value in pixels. Spacing: Space to the sides and to the top and bottom of an image. If no value is entered, no space is inserted. • Horizontal: The space to the right and left of the image. • Vertical: The space above and below the image. |
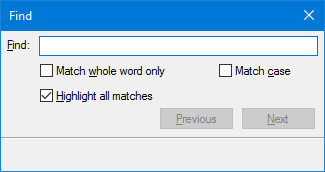
Find | — | Ctrl+F | Find text in the text box.The Find dialog box is displayed
Options: • Find: The string to search for. Type in the box. • Match whole word only: • On: Only whole words that match the search term will be found. For example, if you type • Off: Any word containing the search term will be found. • Match case: • On: Only words with the same case as the search term will be found. • Off: All instances of the search term will be found regardless of case. • Highlight all matches: • On: All matching terms will be highlighted. • Off: Only one matching term at a time will be highlighted. Click Previous or Next to see the next match. |